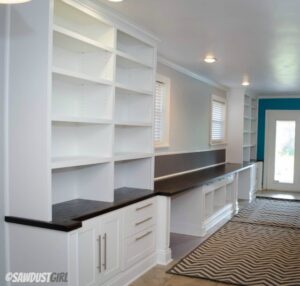
My built-in office cabinets. are. done!!!! So, remember when you gave birth and you were like, “I am never going to forget how my body felt”, and then three short months later, you totally were on board to possibly have another and go through it all again?? Yeah, it’s about the same after building a massive desk and office.
In all seriousness, I am so glad I started with the hardest project in my house, because now all of the others seem small in comparison. I think I just need a small break before tackling my next build! I started this project in April and between working full time and traveling for my job, and kid activities, and summer vacations, I finally finished. Can I just say, I love how it turned out and can’t wait to unpack all of our stuff and fill those bookcases?!
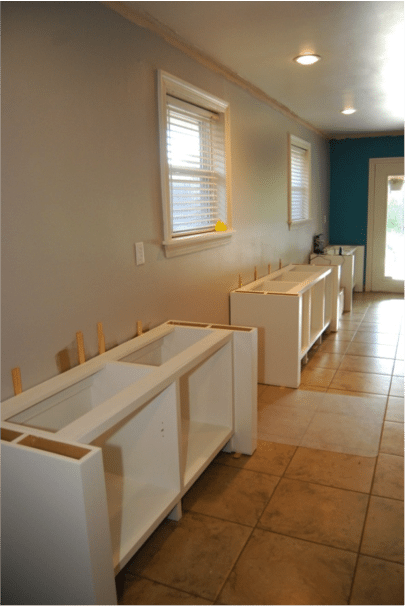
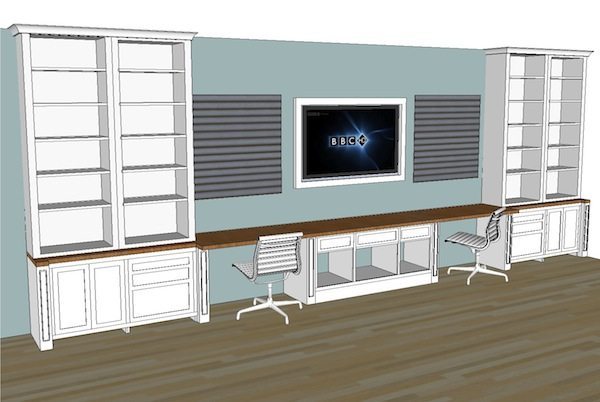
As a little surprise, I am not even sure that Sandra knows that I added a corkboard wall and desk grommets for electrical cords, but I did and I think it will be very useful. Here is all 23′ of desk and our beautiful office furniture!
If you want to see how these built-in office cabinets came together read my Sawdust Diaries here:
This whole experience has been a wonderful one. Sandra has the patience of a saint! Thank you Sandra for sticking with me to the end!
I love Cara’s room! It is beautiful, functional and pure awesomeness. I am proud to have been a part of this DIY journey. ~Sandra
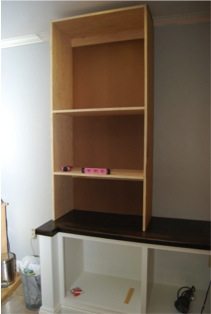
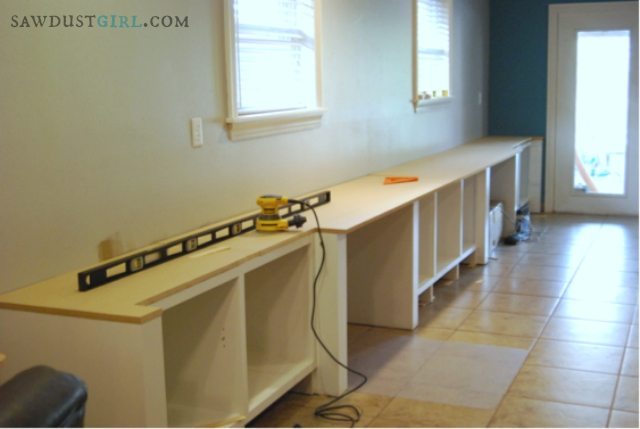
At this point in the game, after the vacations, etc we have lost a little momentum. Never fear though, Sandra has big plans for us that get us motivated again. Now that the countertop is in and looking fabulous, we start in on building the upper bookcases. These bad boys are large and in charge. I am loving how they are coming together. You will see that we even got the shelves level. I also used my Kreg Shelf Pin Jig to drill all of the holes to hold my adjustable shelves.
It’s time to feel good!! If you have ever used an oil based primer, you will totally get that statement. (You may or may not get a slight buzz from the fumes 🙂 )Yep, had to pull all of the upper cabinets down in order to get them all primed.
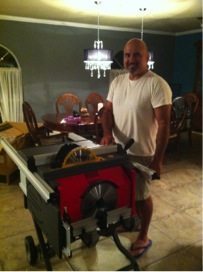
Now that we have gotten through the hard part (or so we think), we decide at this point that we have the knowledge and super powers to go ahead and build built-ins in every single room of this house. (It’s amazing how much confidence you get once you build one bookcase). Anyways, in this moment of euphoria, somehow a brand new table saw not only found its way into the back end of my husband’s truck, but also into my dining room!! What the heck?? Seriously, he babied that thing and let it sit in the house until the first time he had to cut with it, which I insisted be done outside. Now it has its own little corner of the garage. And, can I just say, that thing has shaved off so much time! I love it 🙂
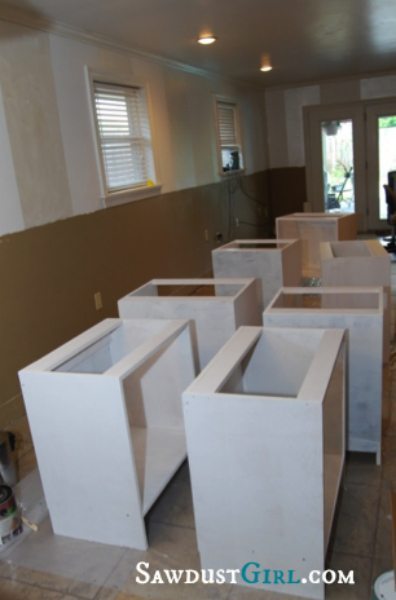
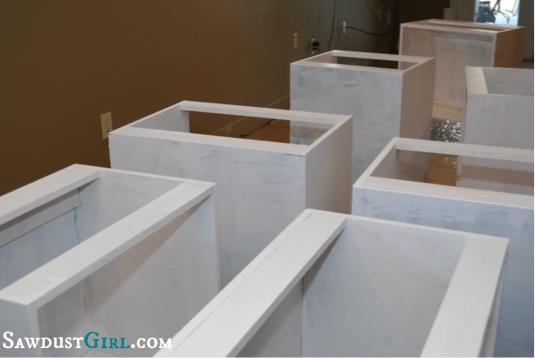
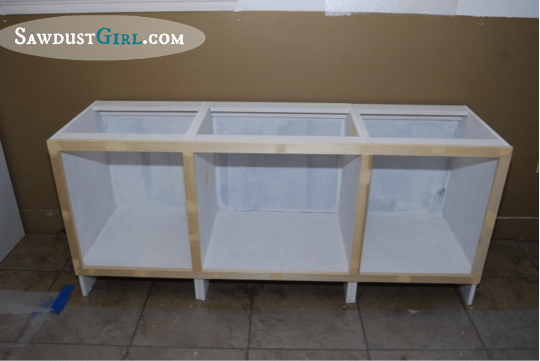
We now have all of the upper bookcases connected together and screwed into the walls. I love the way it is turning out. We have also started to put the baseboards back up. Up next on our to-do list is to build the face frames for the bookcases, cut the shelves, and build some drawers and doors. It is really coming together nicely. I can’t wait to be finished so that I can actually work at a real built in office and put my crafting supplies on the shelves!
Read all of Cara’s posts here: part 1, part 2, part 3, part 4,part 5, part 6, and next up is the Reveal which also has links to free plans for every single piece of furniture in Cara’s office!
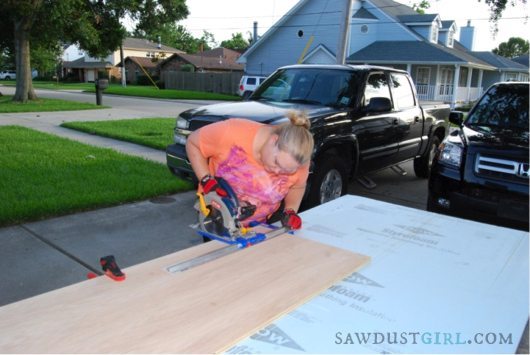
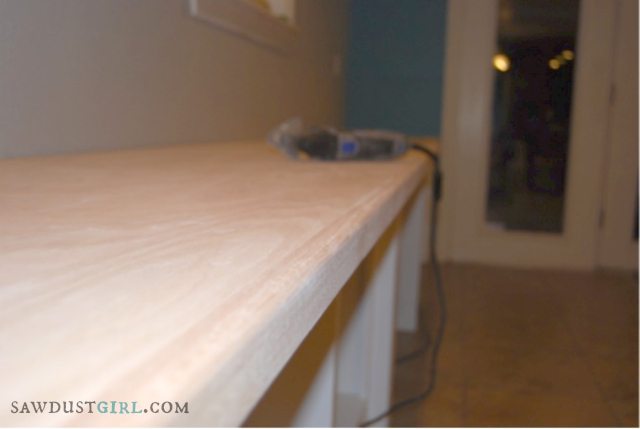
Today I am working on getting the layer of MDF that goes under the oak plywood countertops. I don’t know if the pictures show the work space accurately or not, but I am actually very intimidated by this part of the project. Our countertop is 23 feet long!! This will be seen by everyone and needs to look good. I used MDF for the under countertop part. I rip them all to 24 inches wide and lay them out so I can start marking all of my cuts.
Now I get to cutting.
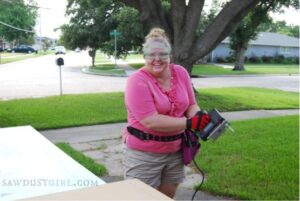
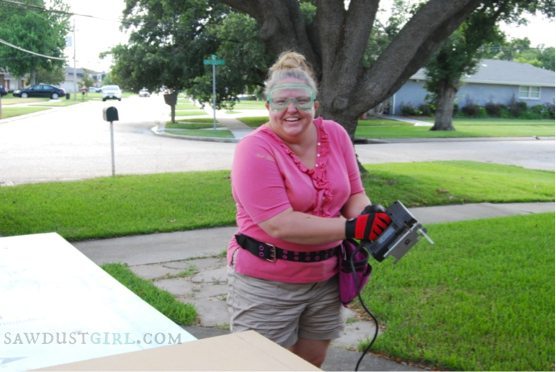
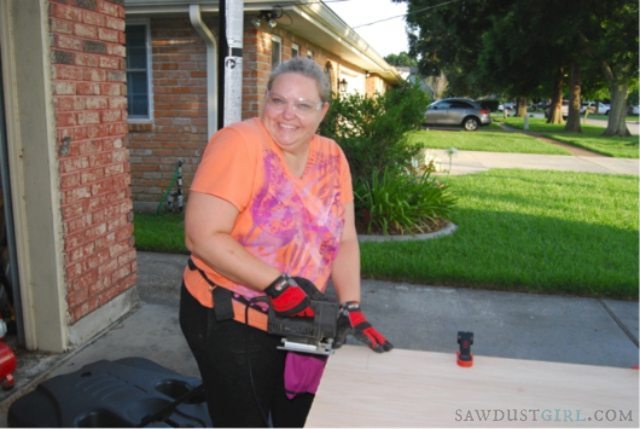
Now, don’t you get all jealous about my pink tool belt. That was my mother’s day gift from my daughter!
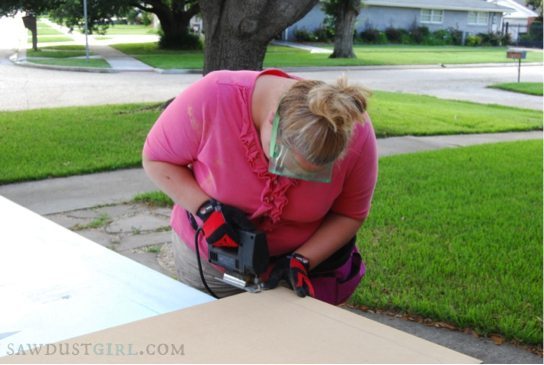
Here I am doing a dry fit of the MDF before I drill it in. Umm, yeah, instead of modeling my pink tool belt, I should have been paying more attention to my cuts. I had some that were not exactly straight and I had to use a power sander to sand down the MDF to get them correct.
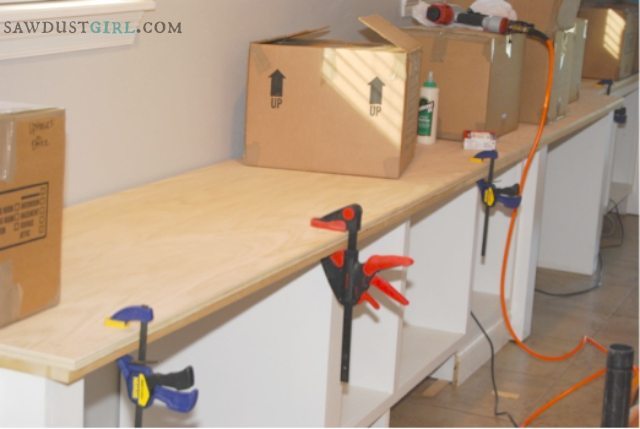
Now that all of the MDF substrate is in, I can start on the actual top that will be seen.
Unfortunately all of the lumber yards in my area only cater to the building industry and are only open 7-4 M-F, so I am unable to get around to them to see my choices of lumber. Instead I went with the big box store and selected a cabinet grade oak plywood, and oak 1X2 for the facing. Same as with the MDF, I rip the plywood into 24 inch width and use my Kreg Rip cut!
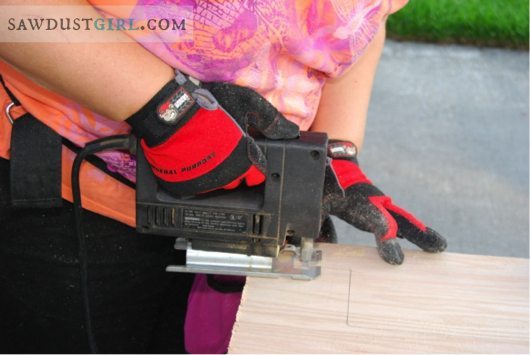
I also make all of my other markings and use the jigsaw for the smaller cuts.
Cutting wood is always fun!
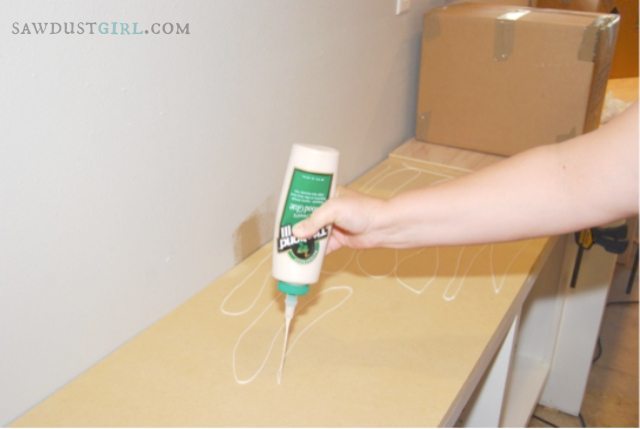
Now that all of the pieces are cut, I use today to glue and nail down the top.
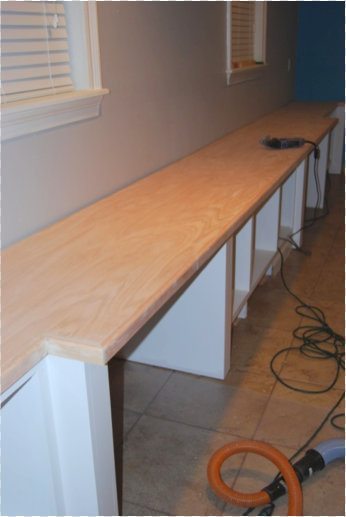
Now that the countertop is down, I move forward with adding the facing edge.
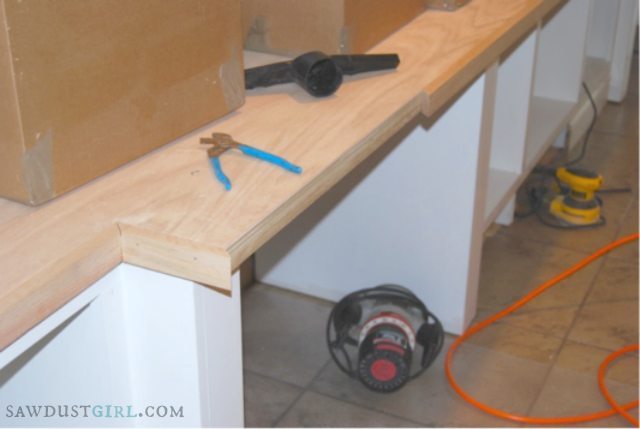
I use a router with a bit and give the facing a curved edge, since I will be working here every day. I wasn’t too thrilled about having a sharp edge on my forearms all day. The router worked like a charm! I love the smooth round edge.
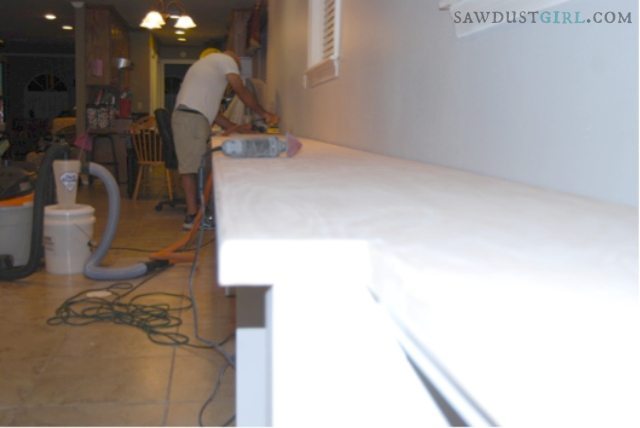
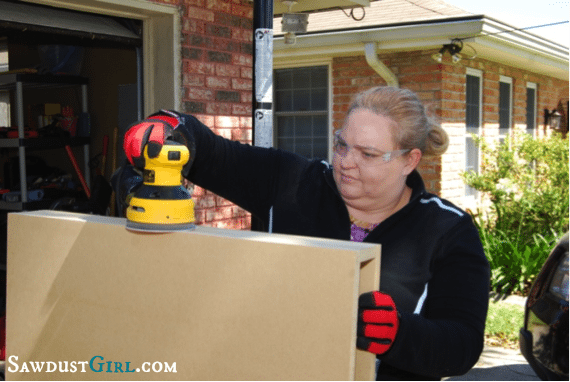
Next my husband sanded the top of the countertop, while I sanded the facing. We used 220 grit to get a super smooth finish.
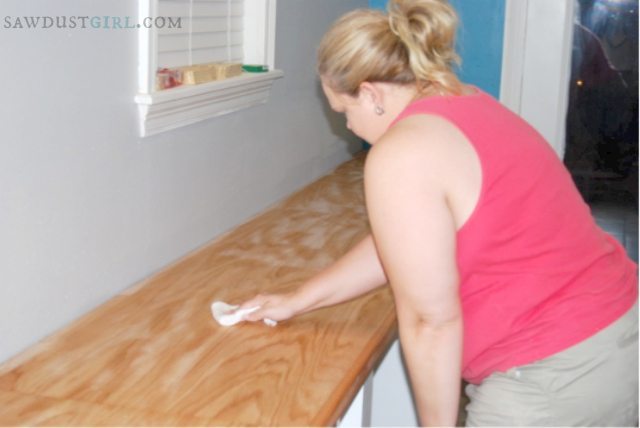
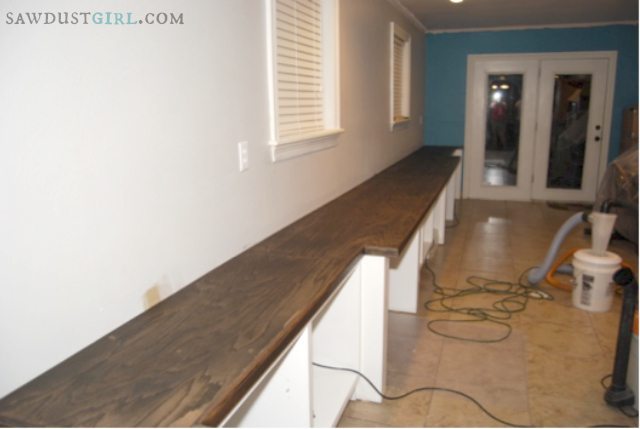
Here it is all ready to be stained.
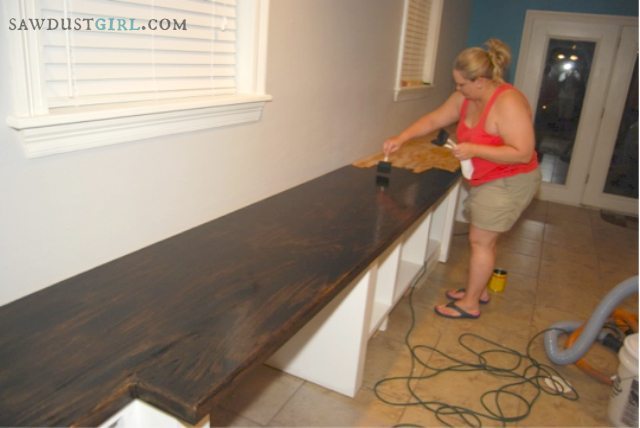
I really wanted to use Sandra’s method of Waterlox tung oil, however there is no store within a 50 mile radius of us that sells it, therefore I am forced into stain and polyurethane. To prep the wood, I wiped it down with papertowels and then I wiped it down once with mineral spirits.
Then the fun begins! I selected an ebony stain. Because this is oak and is a hard wood, I had to let the stain set for 15 minutes and then iwpe it down. I repeated the process the next morning.
June 29th, 2013
I applied the second coat of stain and then I went swimming and took a nap and enjoyed the rest of my weekend. I can honestly say that I.LOVE.IT!! My countertops turned out better than I could have hoped for. I still need to put three coats of polyurethane on them, but that will have to wait until tomorrow.
Cara is cruising along with her office built ins! She always cracks me up with the way she describes her DIY adventures. Need to catch up on her project? Here are part 1, part 2, part 3, part 4.
The day the bubble almost beat me, 2013
I like to think of this day as the day that damn bubble almost got the best of me!!
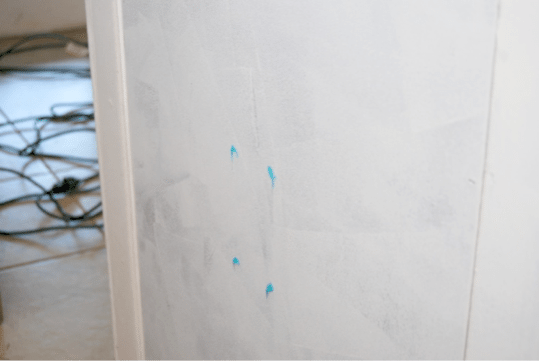
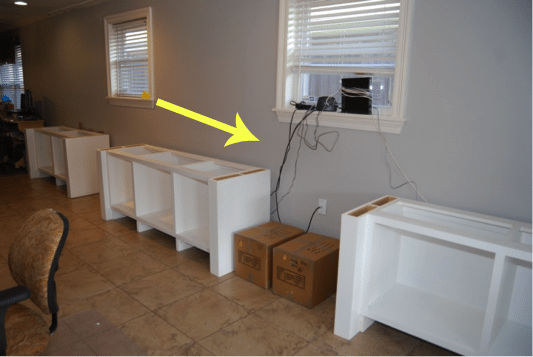
Now that all of the electrical issues are taken care of, now it’s time for me to get to business and install these bad boys into the walls. I used a stud finder to determine where I needed to screw through the cleat and hopefully (fingers crossed) hit a stud, and no, I don’t mean my husband.
Before installing though, everything needs to be level. I thought, sure, this will be easy. I’ll use a couple of shims and that would be it. Was I wrong!! Seriously, there is not a darn thing straight in this house. I lay in bed at night wondering if my house is built solid enough to not fall down. My husband assures me everything is fine, however when we go to install these cabinets into the wall, three things are apparent:
1. My walls are bowed 2. The floors are uneven 3. My ceiling is buckled.
What the hell???
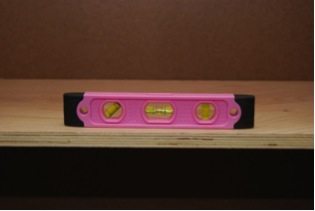
Every time I used a shim to level something out, it threw it out of whack somewhere else and that darn bubble in the level would move. Doesn’t that darn bubble know that I need it perfectly in the middle???? I’m not trying to scare anyone at all, but this is probably the one and only time during this project where I had to step away for a while. I finally decided that I’m not going to be able to get it exactly correct everywhere, and that I would have to live with it knowing that it wasn’t perfect. My husband said that if I came into the house and this was an existing built in desk, I wouldn’t know the difference, and nor will anybody else coming in after me. So, after hearing this and deciding to be a reasonable, rash person, I decided that as long as that darn bubble on the level was SOMEWHERE, ANYWHERE within the two black lines, that it would be fine. In the pictures that follow, you will see how many shims I used to get these cabinets level.
See all of those sticks on top and under the cabinets??
Ahh, that is all done and I can now concentrate on my upcoming vacation!
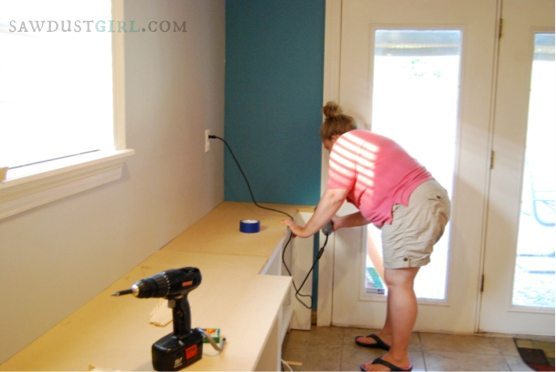
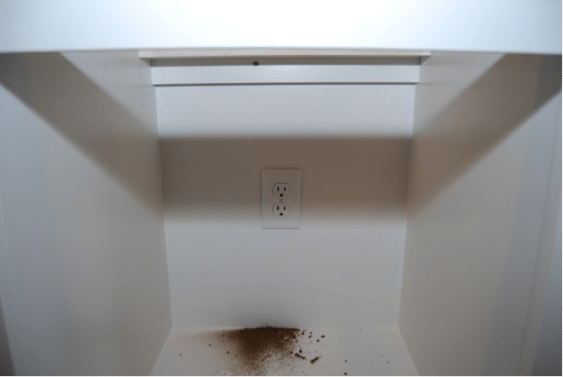
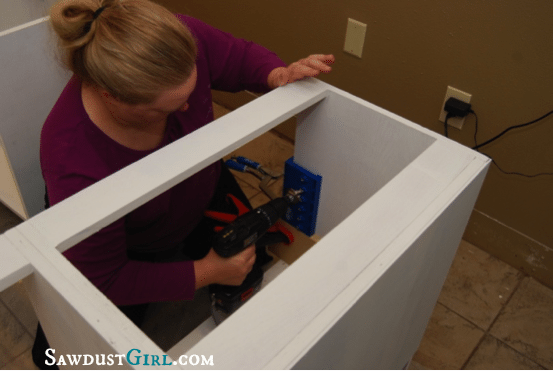
When Cara told me her technique for marking and cutting the electrical outlets in her office built-ins, I giggled …and then asked her to please document it with some pictures to share. So this update is also a tutorial for what I think is a smart tip for marking outlet location.Unusual but very smart! Catch up: part 1, part 2, part 3
Here are Cara’s tips for cutting outlet holes in EXACTLY the right location because after you spend months building them perfectly, the last thing you want to do is cut a big hole in the wrong spot during installation.
***Just make sure that before attempting any electrical work you make sure the electricity is off!***
June 1,
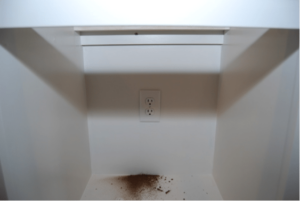
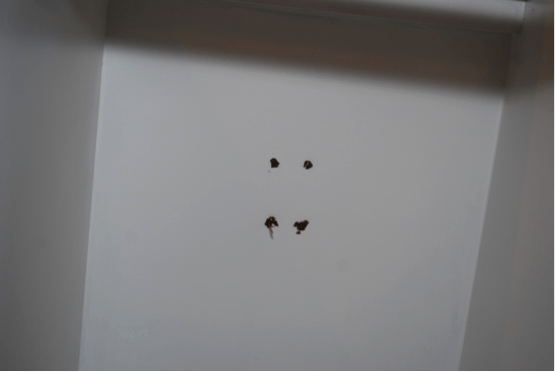
After putting so much sweat, blood and tears (YES, ALL THREE OF THOSE) into building these cabinets, I really didn’t want to screw up cutting a 2 ½ by 3 in box in the back of the cabinet, only to have it in the wrong place.
Enter stage left, Colgate toothpaste.
I honestly cannot remember who told me about this, or if I dreamed it or what, but it worked like a charm for us and it was minty fresh. What I did was put four little dabs of toothpaste on the outlet front, and then I jammed the cabinet into the wall, where it was going to be positioned. Then I pulled out the cabinet and these four little dabs had transferred to the back of the cabinet.
This gave us our jumping off point. We drilled four holes inside to where the toothpaste was and cut out a small rectangle.
Then we trimmed it until the junction box fit in its hole.
If you missed Cara’s first two posts, catch up here: part 1, part 2
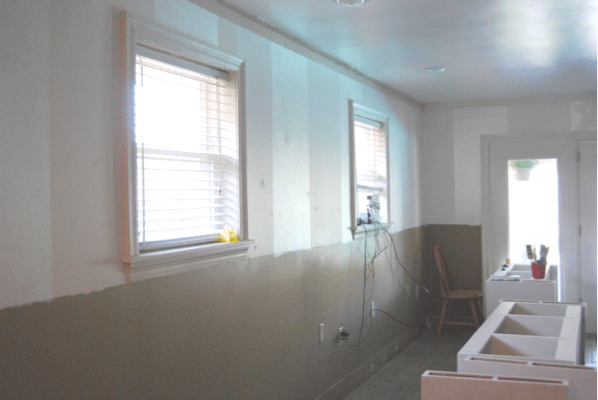
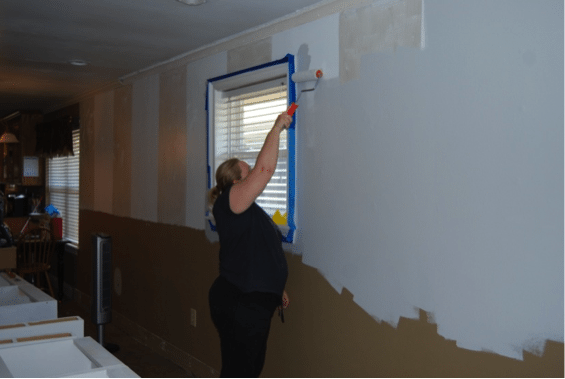
Today, after consulting with Sandra, I decided I should move forward with painting the walls. As Sandra pointed out, this will avoid heartache later when I am trying to paint, after the cabinets are installed, and spilling paint on my new cabinets. 🙂
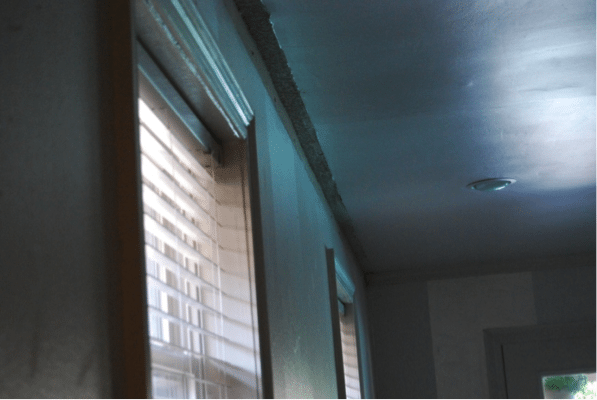
To get started, I have to pull down the crown molding in the area, since the book cases are going all the way to the top. To my delight, I found that the 70’s were still alive under my crown molding and the popcorn ceiling was there. No biggie, just thought it was funny.
Thank you Sherwin Williams for French Grey paint. Adios to weird white striped walls with beige skirt, hello uniformity! I decided to paint the wall at the end of the room with the French doors a bright teal color, since the wall is not that big, and it makes a bold statement.
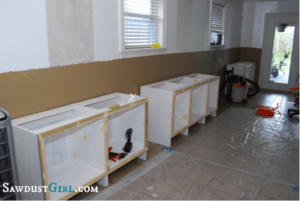
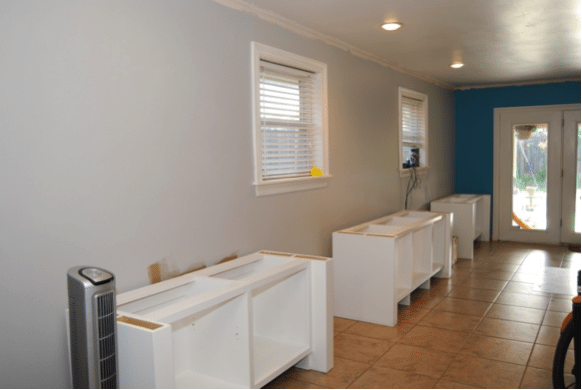
I finished up the second coat of paint on the walls and moved all of the cabinets into place. I also touched up the cabinets with the white paint.
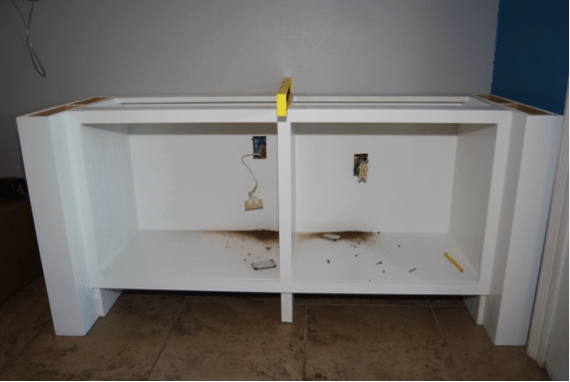
This is the middle cabinet that will hold our three printers (don’t ask), but for those that are curious, I have a work printer, we have a color printer, and I have a wide format printer for scrapbooking.
Now, what to do with those pesky wires and plugs?? Stay tuned…
Follow along as Cara’s project journey continues. If you’re just joining in, catch up on Part 1 first.
April 27th
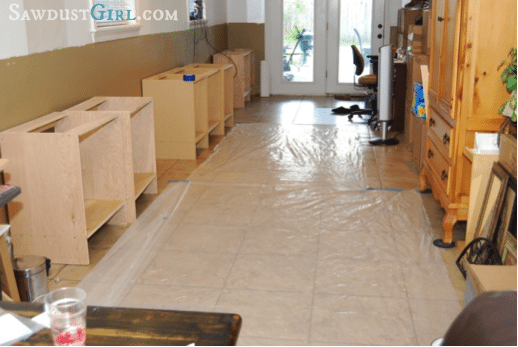
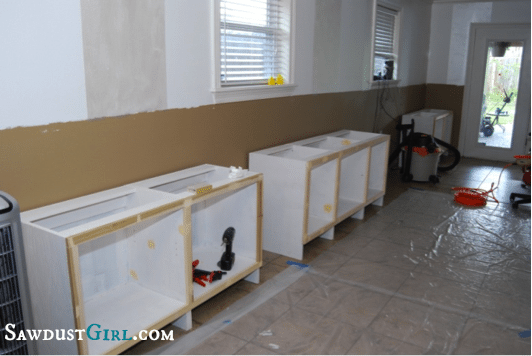
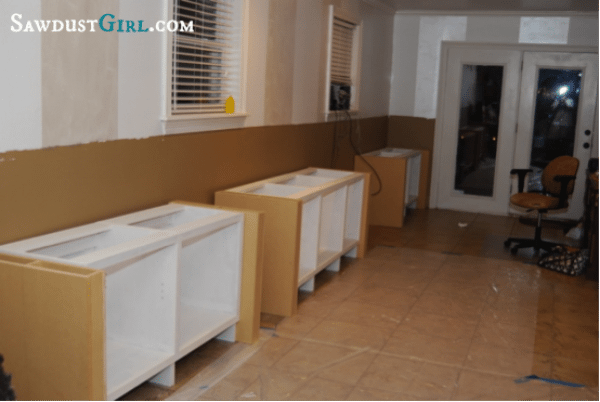
Today got off to a great start. We covered the floor and prepared to start priming all of the cabinets.
The priming went smoothly, but it was a bit tiring on the ol’arm. I have to admit, after being so scared of using the big tools; I kind of missed it today. The painting was not as gratifying as creating the bases, but it has to be done!
Once all of the cabinet bases have their first coat of primer, I take a much needed brake in the pool.
Tick Tock, tick tock, tick tock…literally a picture of paint drying.
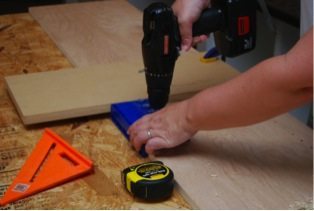
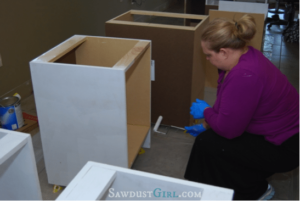
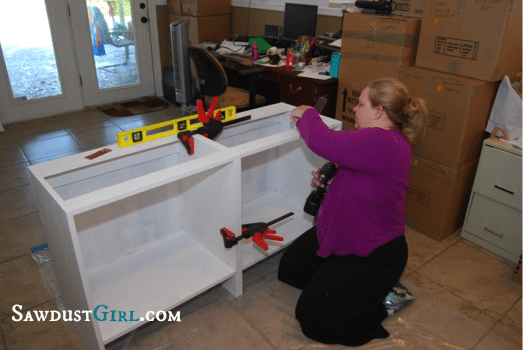
One wardrobe change back into work clothes, and the assurance that the primer is dried, I start screwing the bases together in order to get proper measurements for the face frames. This took a little longer than I thought it would. Getting everything flush and level, took both me and my husband. I’m so glad he was there to help me!
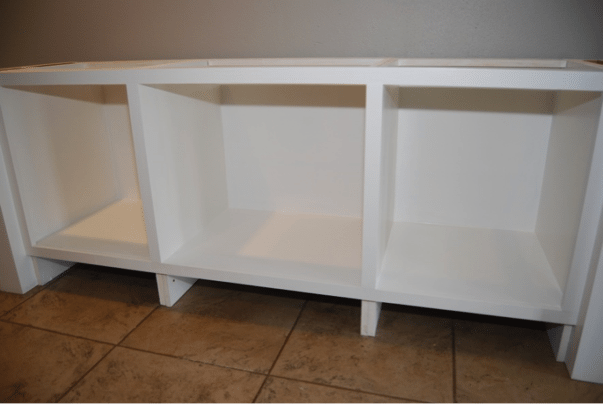
After attaching the bases to each other, I used my Kreg Shelf Pin Jig, and a block of MDF to drill the hole for the shelf pins. Since I only need about 3 holes in these bottom bases, it really was an easy job.
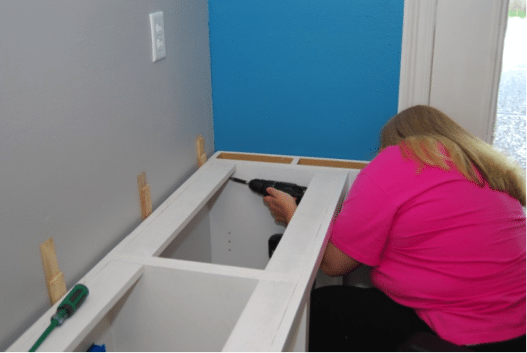
So, as you can tell, it is now dark, and like I said, connecting the bases took me longer than I thought it would, but I was determined to get through the “to-do” list assigned to me by Sandra, so I continued on to make the face frames. I used the Kreg Jig to drill holes in the face frame material.
Well, I didn’t get as far as I had wanted to, but I did get one face frame put together and attached. I have one more cut and ready to be assembled, and I will need to cut the face frame out for the middle section.
May 2, 2013 Ok, over the past couple of days, I have managed to finish building and attaching all 3 face frames for my 3 sets of cabinet bases. I haven’t quiet caught up on my to-do list, but I am close. My husband was kind enough and used wood filler to fill in where we nailed in the face frame, so now I just need to find time to prime it before the weekend!
May 3rd, 2012 Today the face frames got their first coat of paint and we sanded down all of the cabinets. Unfortunately, I don’t have a picture to document that. Oh well, I swear it is done!
May 4, 2013 Today we had some family commitments…Ok, so we went to an amusement park, but family commitment sounded so much more like something we “had” to do, rather than the wild crazy fun we were having! Oh well, sometimes you have to get out there and just be crazy. Anyways, due to our very important commitment, we didn’t get started on our building until 4 in the afternoon. So, our assignment for this weekend was to build 6 legs for the cabinet bases. Given my time constraints, my goal for today was just to get everything cut so we could build tomorrow.
May 5, 2013 And we are back on track…. Today we knocked out the six legs fairly quickly. I consider it a good day when I only have to bug consult with Sandra once during the day! After building the legs, we needed to sand all of them smooth, but I only got one done. The rest will have to wait for me to do during the week. Unfortunately, I have a dinner to make, laundry to do, and homework to round up, so sanding gets bumped to low priority. Plus, I have to go out of town this week for work, so I am hoping the sanding fairy, aka my husband, will have pity on me and sand these bad boys for me. Oh, who am I kidding? He’s probably counting down the minutes until I leave so he can have full control over the project and play with all of the tools we’ve been buying!
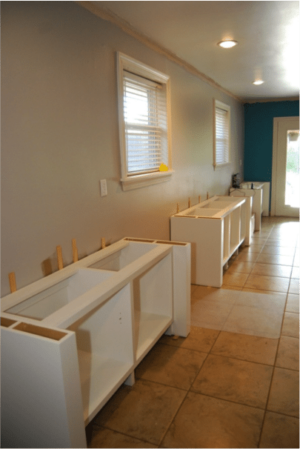
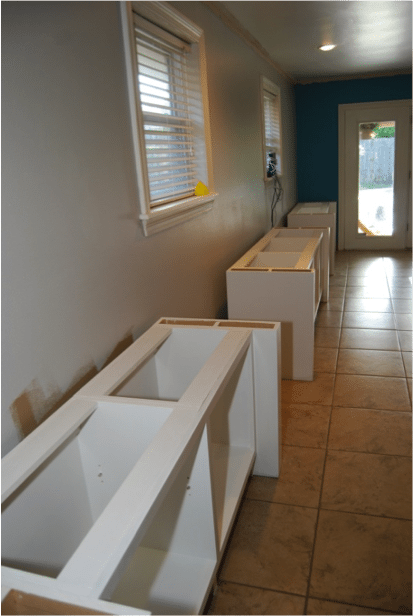
Here are the legs sitting next to each cabinet base. I know is sounds totally crazy, but my husband and I stand in there and discuss the building of the cabinets, how it is all coming together so well, how we can’t wait until it is all done , and how we are going to transform our house with these new skills we have learned.
There is this peaceful silence where we both drift into our daydream of an organized, fully functioning house…then the kiddo screams, “is dinner ready”? And we are both startled back to reality and off we go again to do the things that make up our life.
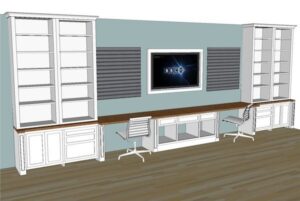
Cara and family just moved into their new home about a month ago and they were ready to jump in feet first to get this space ready to use as an office and TV room. You walk through those French doors to the pool so the middle of the room is left open so there is a nice walkway but the sofa will sit against the wall exactly opposite a mounted flat screen tv.
I think it’s going to be an awesome multi-purpose, highly functional and gorgeous room.
Here’s Cara’s Project Diary…
March 22
So, we have officially been in this house for 4 weeks. We were relocated to this new area for my husband’s career. It was a good move, however we lost a lot of space due to the increase in housing costs in our new location. So, where do I start? Well, by downsizing, we gave up a craft room, separate office, and a family room. Now, in the new house, I basically have a room with two very long walls, 19 feet to be exact and no storage. What’s a girl to do?? Call in the big guns and reach out to Sandra.
Here is where we started. A lot of boxes and a hot mess. Things I love=tile floor, can lights; things I hate about this room=weird paint job, crappy chair railing, no storage.
Now, don’t you go feeling sorry for me, because beyond those French doors is a large swimming pool and private oasis. It’s just this room that lacks a defined purpose.
So, the basic plan for this room is to have a wall of built ins that will include two desks, bookshelves, and custom shelving for my printers. This room will have a coach in it, and a flat screen. So, we now have a plan to gain back our office, craft room, and family room. It will be amazing!!
April 9
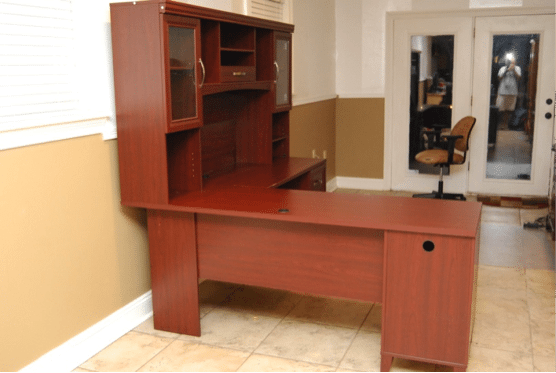
Ok, so this is the week we really start! Plans are being drawn up and we have our first instructions – clean out the room and remove the baseboards. Umm, ok. Where am I going to put all of this crap?? Thank goodness for Facebook online garage sales. The desk went for a cheap $50, I threw out some things, and the rest remains in boxes to be unpacked once my built in desks, cabinets, and bookshelves are ready.
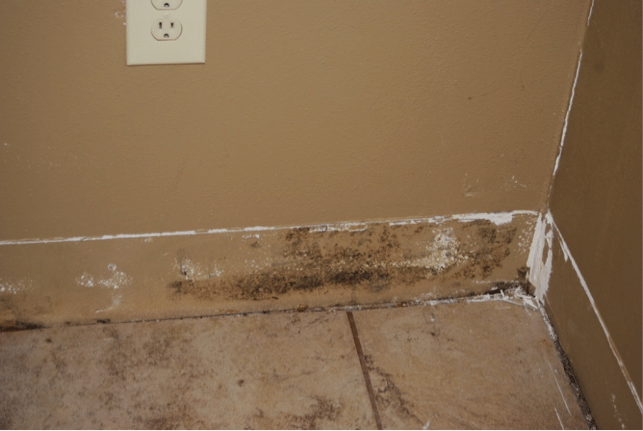
We removed the baseboards and to our unfortunate delight, we uncovered a moldy corner. My husband, fortunately for me, wrote his dissertation on mold, and knew exactly what to do, so I promptly put him on clean up duty. He did a fabulous job!
April 13
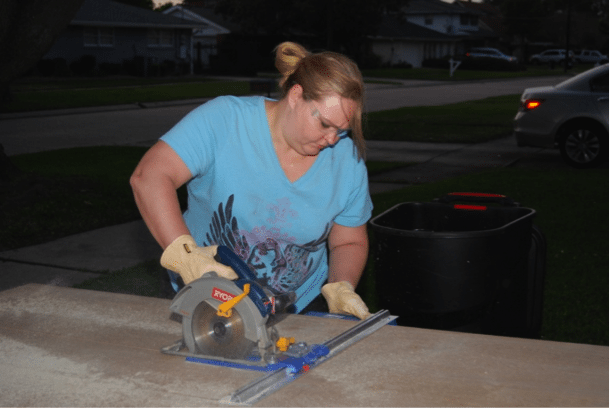
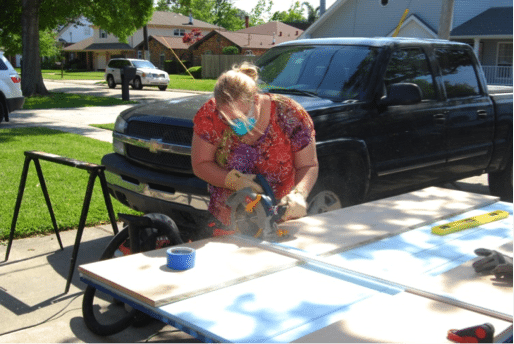
Alright, this is the big day. This is when I find out if I am made of the stuff that champions are made of (ok, wood working champions). We got a little bit of a slow start, but we headed out to our local big box store. OMG, what the heck, is everyone and their dog here today??? Seriously, parking was a mess. Everyone who thinks they can build something was here. Poor fools, if only they were as professional as me with my folder of instructions from Sandra and my fancy coffee cup. Let’s see here, oh we want the big boards. Crap! Those are big boards. No biggie, I’ve got my husband and 7 year old daughter, we’ve got this. We need how many? Ok, time to flag down a person in a vest. 10 minutes later, cart loaded with big sheets of wood. Check. Next, we need something called “hardboard”. We need what?? Ok, I can do this. My husband and I start going up and down the aisles. Ok, can’t find it. I need to make a quick call to Sandra, who immediately is able to direct me to what I need, since the store associate wasn’t able to help us at all. Hardboard loaded, check. Screws, nails, and one bathroom break, and 30 more minutes later we are completely loaded and heading out to build something great.
We get home, and start getting set up when my daughter reminds me of a birthday party she is supposed to be going to. Oh man! A change of clothes and some makeup and we are out the door.
I finally make it home around 5:30 and I am ready to start sawing!!! Or so I thought, after 5 minutes of said daughter begging to go swimming, hubby and I give in and go for it. That literally lasted long enough for me to get my left big toe in. Let’s just say it isn’t warm enough yet.
Now I am ready to get started on this project, what’s that you say family, you want to eat dinner?? Are you kidding me?? Can a woman just get some time to cut her wood or what?? Ok, KFC it is then. Gobble gobble gobble. Now, I am going to cut some wood.
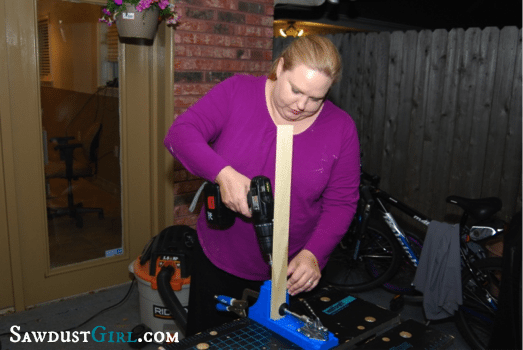
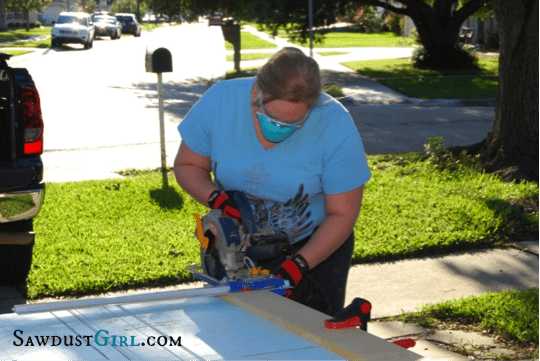
I used the Kreg Rip Cut and loved it!!
I got some cuts made, but as you can tell, it is really getting dark and we have close neighbors, so I called it a day and vowed to finish my cuts the next day and build!!
April 14
Today was a great day! I was able to finish all my cuts for my first four cabinet bases. I think I only bugged Sandra about 100 times, but she was always there for me and got me through all of my questions.
So, once we got to the cuts that were too large for the Kreg Rip Cut, we bought the Bora clamp, which allowed us to make straight wide cuts. I finished making my cuts.
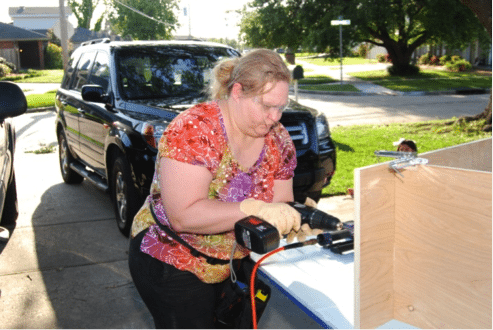
Then the building begins!
I did everything just as instructed by my fearless leader!
Isn’t that the cutest nail gun?? Don’t tell my husband, but it’s purple!! How did he end up with a purple nail gun?? I don’t know, but I just claimed it as my own.
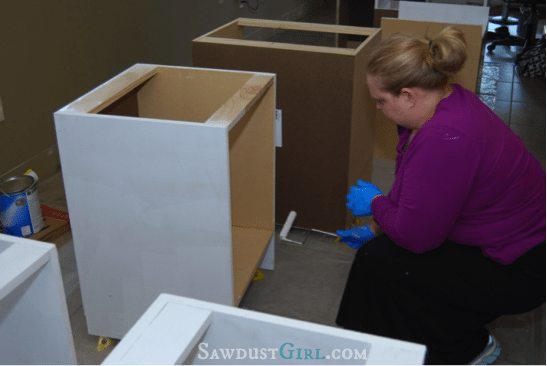
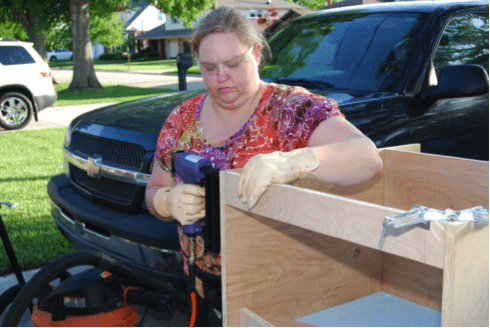
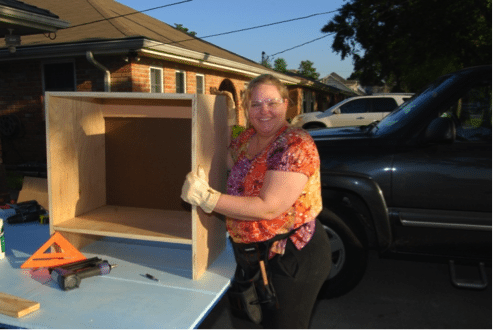
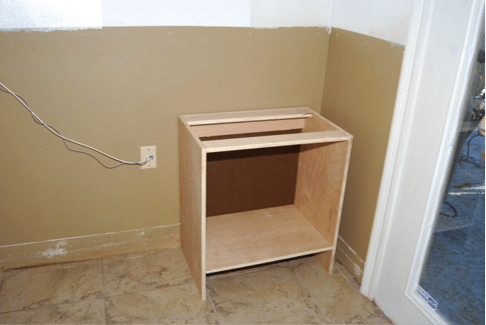
Yes people, that is the smile of achievement!! It only took me two days, but darn right I am ecstatic!!
Here it is, in all of its glory!! Now only three more to go this week! Now that I have one under my belt, hopefully the rest will go a little faster.
Me: It is SO EXCITING when you build your first ever cabinet and it’s Solid — and it’s Square. It’s the most beautiful thing in the world at that moment. Cara’s cabinets look beautiful! It does get easier and go faster after you get it down. The first one is slow because it’s all new. You’re apprehensive, nervous and excited. Then you learn all the tricks and you’re off and running.